On this entry, I’m going to explain how to install a Bitbucket server on our Raspberry. Hence, we’ll be able to host our repositories and use them for software production environments due to it’s usability and portability.
First of all, I’m going to install and configure it on a “Raspberry Pi 2 model b+” with an PostgreSQL database.
To get my Bitbucket server on the Raspberry Pi, we need to overclock our pi board editing the /boot/config.txt file:
hdmi_force_hotplug=1 #It'll prevent data loss from SD
force_turbo=1
boot_delay=1
arm_freq=1000
core_freq=500
sdram_freq=500
over_voltage=2
gpu_mem=16
Then, let’s download the server installer, for Raspberry Pi’s Git version (last one is 2.11.0), therefore we need to install an old bitbucket server instance.
A valid one could be Bitbucket Server 4.14.9 which will work fine with our Git version.
To check our Git version:
git --version
We can find the binary installer file of our chosen version on: Atlassian Bitbucket Archive
wget https://www.atlassian.com/software/stash/downloads/binary/atlassian-bitbucket-4.14.9-x64.bin
Also, let’s make it executable with:
sudo chmod a+x atlassian-bitbucket-4.14.9-x64.bin
Hence, we can run it with:
sudo ./atlassian-bitbucket-4.14.9-x64.bin
Another step, we have to sudo run it to be able to launch it as a daemon on system startup. Hence, you just have to follow the installer instructions to finish the server’s instance installation.
Lately, we can install the PostgreSQL DB:
sudo apt-get install postgresql
We can also use a MySql DB, but It’s seems to be less efficient.
Once installed bitbucket on our Raspberry Pi, we need to create a bitbucket user, and database for our recently installed instance. Furthermore, we have to change to Postgres account:
sudo -i -u postgres
Next step, access to the postgre’s console writing the following:
psql
In addition, we have to create the user bitbucketuser with password generic, and database called bitbucket, which is managed by bitbucketuser:
CREATE ROLE bitbucketuser WITH LOGIN PASSWORD 'generic' VALID UNTIL 'infinity';

CREATE DATABASE bitbucket WITH ENCODING='UTF8' OWNER=bitbucketuser CONNECTION LIMIT=-1;
So, let’s quit the console with:
/q
And also, quit from the Postgres account:
exit

FinalConfigurationBitbucket
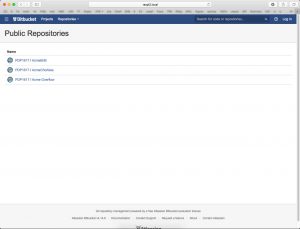
Finally, let’s go back to our user account, we can restart our Raspberry Pi and configure our Bitbucket server on port 7990 and enjoy it.
Probably it’s a little bit slow. We are able to change the amount of memory assigned to the JVM editing the file /opt/atlassian/bitbucket/4.14.9/bin/setenv.sh:
sudo nano /opt/atlassian/bitbucket/4.14.9/bin/setenv.sh
And modifying the following lines:
JVM_MINIMUM_MEMORY="XXXm"
JVM_MAXIMUM_MEMORY="YYYm"
For more information about Bitbucket, please check that link.
If you want some more tutorials about Raspberry Pi, please check my blog posts.